OneDrive is Microsoft’s built-in cloud storage solution, and it’s tightly woven into Windows 10 and 11. For many, it’s a seamless way to back up files, sync across devices, and keep things accessible. But let’s be honest—OneDrive isn’t for everyone. Maybe you’ve got another cloud service you prefer. Or perhaps you just want to keep your files local and claw back a bit of system performance. Whatever your reason, knowing how to disable OneDrive syncing can be really useful. This guide walks you through several straightforward methods to pause, tweak, or entirely turn off OneDrive syncing on your Windows machine.
Why Disable OneDrive Sync on Windows? Let’s quickly touch on why you might want to turn off OneDrive syncing in the first place:
- Privacy Concerns: Not everyone’s comfortable having their files automatically uploaded to the cloud.
- Performance: OneDrive can hog system resources, especially noticeable on older or budget PCs.
- Redundancy: If you already use Google Drive, Dropbox, or another provider, OneDrive might feel unnecessary.
- Disk Space: Syncing large folders locally can chew up precious storage, even with the “Files On-Demand” feature.
- Annoyance Factor: Constant prompts and its ever-present folder in File Explorer can get irritating.
- Granular Control: Sometimes, you only want a few folders to sync—not your whole desktop.
Understanding OneDrive Sync Options Before diving into how to stop OneDrive, it’s good to understand the different levels of control you actually have:
- Pause Syncing: Temporarily halts all syncing. Handy for short breaks.
- Unlink Account: Disconnects your PC from OneDrive. Files stay put, but no more updates go back and forth.
- Choose Folders to Sync: Lets you pick and choose which folders are mirrored on your PC.
- Disable Known Folder Backup: Stops folders like Desktop, Documents, and Pictures from auto-syncing.
- Uninstall OneDrive: Nuke it from orbit—it’s the most definitive option.
Step-by-Step: How to Disable OneDrive Sync on Windows Here are your options, depending on how far you want to go:
Method 1: Pause OneDrive Sync (Temporary)
If you’re in the middle of a big download or just want to preserve bandwidth:
- Find the Icon: Look for the OneDrive cloud icon in your system tray (lower-right corner).
- Right-Click It: Then hover over “Pause syncing.”
- Pick a Time: Choose 2, 8, or 24 hours. The icon will show a pause symbol.
- Resume When Ready: Just right-click again and hit “Resume syncing.”
Method 2: Choose Which Folders to Sync (Selective Sync)
Still want to use OneDrive but not for everything?
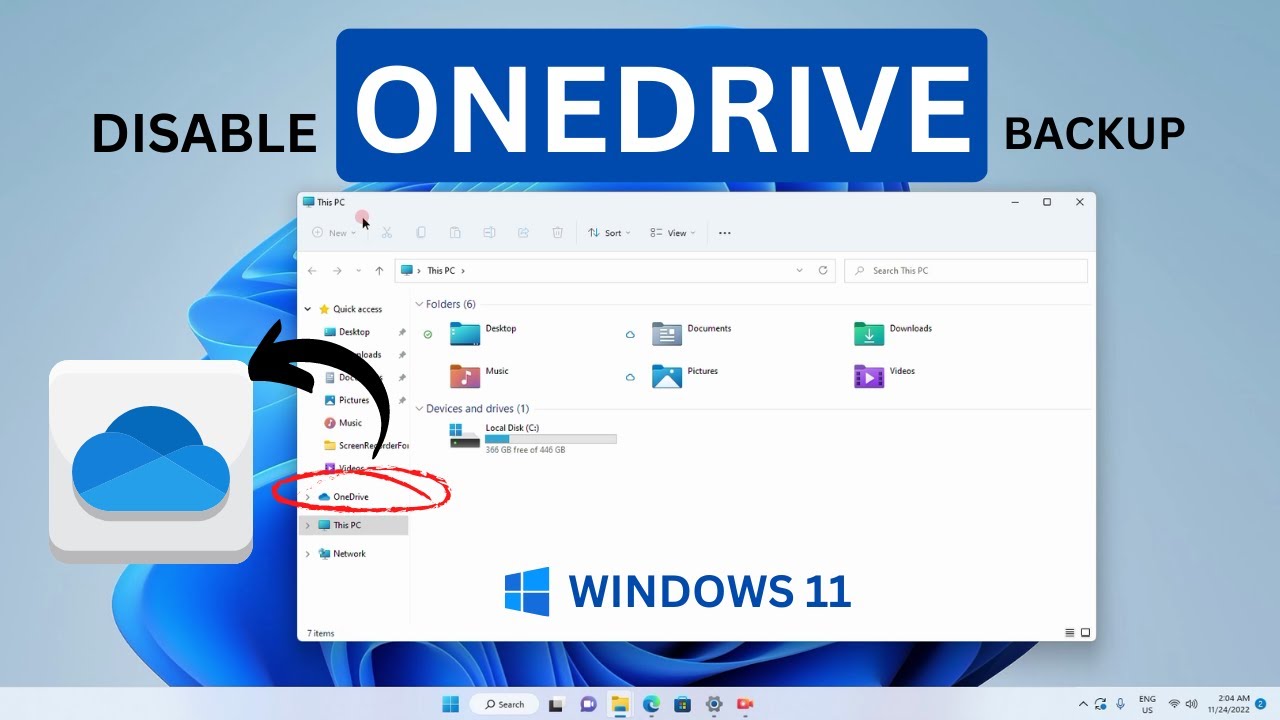
- Open Settings: Right-click the OneDrive icon and select “Settings.”
- Sync and Back Up Tab: Head to this section.
- Manage Backup:
- Click “Manage backup” or “Manage folders.”
- Toggle off folders like Desktop, Documents, or Pictures.
- Save changes.
- Choose Folders:
- Click “Choose folders.”
- Uncheck folders you don’t want on your PC.
- Click “OK.”
Method 3: Unlink Your Account from OneDrive
This one stops all syncing but leaves your files untouched.
- Open Settings Again: Right-click the icon, go to “Settings.”
- Account Tab: Click it.
- Unlink This PC:
- Click the button.
- Confirm when prompted.
- Files remain on your PC but won’t sync anymore.
- Delete the OneDrive folder manually if you want.
Method 4: Disable OneDrive via Group Policy Editor (Advanced)
More permanent and works well for Pro, Enterprise, or Education editions.
- Run gpedit.msc: Press Win + R, type gpedit.msc, and hit Enter.
- Navigate to Policy: Go to Computer Configuration > Administrative Templates > Windows Components > OneDrive.
- Enable the Policy:
- Double-click “Prevent the usage of OneDrive for file storage.”
- Set it to “Enabled.”
- Apply and OK.
- Restart: Changes take effect after a reboot.
Method 5: Uninstall OneDrive (Complete Removal)
For those who are done with it entirely:
- Open Settings: Press Win + I or use the Start Menu.
- Apps: Go to “Apps & features.”
- Find OneDrive:
- Scroll or search for “Microsoft OneDrive.”
- Click it, then hit “Uninstall.”
- Follow the prompts.
My Personal Experience with OneDrive Sync When I first started using Windows 10, I found OneDrive’s behavior a bit intrusive. Saving something to “Documents” would instantly begin uploading, which isn’t ideal when you’re trying to conserve bandwidth during a Zoom call. Eventually, I used the “Manage backup” option to stop syncing Documents while still backing up my Pictures. That small change gave me more control and less frustration. It felt like Windows was working with me instead of steering the ship.
Conclusion Disabling OneDrive sync on Windows isn’t about rejecting the cloud—it’s about choice. Whether you’re pausing it for a bit, turning off certain folders, unlinking your account, or removing it entirely, the tools are all there. With a few clicks, you can shape your system’s behavior to better suit your needs and, in the process, maybe even make your PC feel a little more like yours.