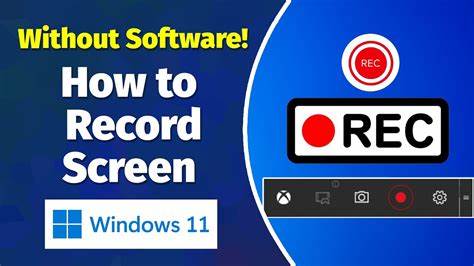
Recording your screen is useful for tutorials, presentations, or capturing gameplay. Windows 11 offers built-in tools to record your screen without needing third-party software. This guide explains how to use native Windows 11 features to record your screen easily and effectively, based on the latest information and personal experience.
Step 1: Use Xbox Game Bar for Screen Recording
Windows 11 includes Xbox Game Bar, a powerful overlay tool primarily designed for gamers but usable for any screen recording.
How to Open Xbox Game Bar
- Press Windows + G keys simultaneously.
- The Xbox Game Bar overlay appears with various widgets.
Start Screen Recording
- Click the Capture widget (camera icon).
- Press the Record button (circle icon) to begin recording.
- Alternatively, press Windows + Alt + R as a shortcut to start and stop recording.
- The recording status appears on the screen; you can pause or stop recording using controls.
Step 2: Adjust Xbox Game Bar Settings
Before recording, you can adjust settings for optimal results:
- Open Xbox Game Bar.
- Click the Settings icon.
- Navigate to the Capturing section.
- Choose video quality, frame rate (30fps or 60fps), and audio options.
- Enable microphone capture if you want to record voiceover.
Configuring these options ensures recordings meet your needs.
Step 3: Locate and Manage Recorded Videos
By default, recordings are saved to:
C:\Users\[Your Username]\Videos\Captures
You can:
- Access recordings quickly from the Xbox Game Bar’s Gallery widget.
- Edit or share videos directly using the Photos app or video editors.
Step 4: Use PowerPoint for Screen Recording (Optional)
If you have Microsoft PowerPoint installed, it includes a screen recording feature.
How to Use PowerPoint Screen Recorder
- Open PowerPoint and create a new slide.
- Go to Insert > Screen Recording.
- Select the screen area to record or full screen.
- Click Record to start, and use the stop button in the control dock.
- The recording is inserted directly into the slide.
- Right-click the video and choose Save Media As to save it as a separate file.
PowerPoint screen recorder is useful for quick clips integrated into presentations.
Step 5: Tips for Better Screen Recording
- Close unnecessary applications to avoid distractions and reduce CPU load.
- Use a good microphone for clear audio.
- Record in a quiet environment to minimize background noise.
- Practice keyboard shortcuts for efficiency.
- Review recordings for quality before sharing.
Step 6: Troubleshooting Common Issues
- If Xbox Game Bar doesn’t open, ensure it’s enabled in Settings > Gaming > Xbox Game Bar.
- For no audio in recordings, check microphone permissions and audio settings.
- Recording might fail on older hardware; ensure your device meets minimum requirements.
- If recording stops unexpectedly, check disk space and system performance.
Personal Experience
I found Xbox Game Bar intuitive and reliable for most screen recordings, especially with keyboard shortcuts that simplify the process. For presentations, PowerPoint’s recorder saves time by embedding videos directly.
Conclusion
Windows 11 provides easy-to-use built-in tools to record your screen without additional software. Xbox Game Bar is ideal for versatile, high-quality recordings, while PowerPoint suits quick presentation clips. By following these steps, you can create effective screen recordings smoothly.


